5 Tips for Getting Great Results in Pediatric Restorations
When a child’s teeth show signs of decay, a pediatric dental crown allows the child to smile with confidence—and prevents future dental problems. Every case is different, and your specific approach will vary depending on how much decay is present or what other type of damage is affecting the tooth (or teeth). However, the same best practices generally apply. Here are some tips for working with esthetic pediatric crowns and getting long-lasting results that will keep young patients (and their parents) happy.
1. Prep fillings first.
In most cases, prepping crowns will draw some blood. Prepping all the fillings before starting on the crown prep allows you to have a clear view of all teeth throughout the procedure. It also helps maintain a clean field.
2. Shape the tooth for easy seating.
The ultimate goal is to shape the tooth so it matches the inside of the crown. Start by reducing the occlusal surface by 1.5 mm to 2 mm, and then use a #700 bur to make interproximal cuts all around the tooth. One of the secrets to easier seating is to be sure to remove sufficient enamel from the lingual/palatal side of the tooth—something that is often overlooked.
“If you look at the inside of the crown, it has the natural anatomy of a tooth, and the lingual surface has greater reduction than on the facial. You have to make the prep look like the inside of the crown to get the crown to seat down straight all the way,” says Joshua Bresler, DMD, of Doc Bresler’s Cavity Busters, a pediatric dental practice with eight locations in the greater Philadelphia area. He is also an assistant professor of pediatric dentistry at both Temple University Kornberg School of Dentistry and the University of Pennsylvania School of Dental Medicine.
Using the #700 bur also makes it possible to take the slices below the gumline without creating a ledge. Dr. Josh suggests holding the tapered bur parallel to the long axis of the tooth.
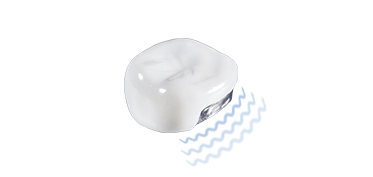
Choosing a crown with a large internal cavity can minimize prep time and allow for easier placement.
3. Don’t be afraid to be aggressive.
Getting a solid result that will serve the patient in the long run may require an aggressive approach to prepping. This is especially true due to the nature of pediatric teeth—smaller and thinner than adult teeth with a thinner enamel layer.
“If you miss a Class 2 lesion on a primary tooth, six months later instead of needing a filling, it’s going to need a crown, and a year later, mostly likely it will have to come out,” says Jason Bresler, DMD, also of Doc Bresler’s Cavity Busters. He is also an assistant professor of pediatric dentistry at Temple’s Kornberg School and one of Incisal Edge Magazine’s Top 40 Dentists Under the Age of 40 in the United States for 2018.
“While it may seem a little aggressive at first, in the long run you’re doing less work. It’s also easier for the patient, because there’s no difference in discomfort as long as the child is properly numb,” he says.
4. Be smart about sizing.
Once the tooth is prepped and filled, try on crowns to find the proper size. If restoring several teeth, start by sizing the centrals. Start with a crown in the middle of the size range offered, and work up or down the range as necessary.
“It’s easier to go up or down from there, rather than starting from size 1 and continually working your way up,” says Dr. Jason.
Once you’ve fit the proper size for the central, try going up one size for the lateral. For the canines, start by trying the same size you fit on the central. For example if you fit a central 3, try a lateral 4; if you fit a central 2, try a lateral 3. If you fit a central 3, try a canine 3.
“Most of the time, it’s a good, easy way to quickly judge what sizes you need,” Dr. Jason says.
5. Crimp conservatively.
Crowns should fit snugly—but not so tight that they are difficult to adjust once they are in place. Don’t get carried away with crimping.
“Use a bird beak plier to put one notch on the lingual side of the stainless steel part of the crown,” suggests Dr. Josh. Doing this relieves some pressure on the facing of the tooth. When the crown is filled with cement, it should still have enough play to rotate the crown, if necessary, to seat it straight.
The cement will play a large role, in crown retention, he adds. Crowns with a simulated crimp or pre-crimped margins can also help with retention while allowing easy seating and adjustment.

Exclusive Retentive Pre-Crimping
Cheng Crowns are the only prediatric crowns that have both pre-crimped margins and etched interiors to maximize adhesion.
For more information on working with Cheng Crowns, view our Cheng Crown Academy How To Videos.